Your cart is currently empty!
how to color your hair like a pro
•

From Entrepreneur To Creator: My Curious Journey To Faith Pt.3 Salon
“Your beauty should not come from outward adornment, such as elaborate hairstyles and the wearing of gold jewelry or fine clothes. Rather, it should be that of your inner self, the unfading beauty of a gentle and quiet spirit, which is of great worth in God’s sight.”-1 Peter 3:3-4 (further Reading)
How to Color Your hair Like a Pro (Without the Salon Price Tag!)
Let’s be real—seeing those dreaded grays pop up is one of the scariest moments for a woman. But you know what’s even scarier? Dropping $200
every 6 to 8 weeks for a root touch-up at the salon. 😱
I know—because I was a hairstylist for over 20 years and a master colorist who used to charge exactly that for a root color, cut, and blowout. But here’s the good news: root touch-ups are one of the easiest hair color services to DIY! And I’m going to show you how.
Step 1: Formulation (Choosing the Right Color & Developer)
While I can’t formulate your exact color (because hair coloring is unique to each person), here are some general guidelines:
🔹 Color Levels (1-10):
- 1 = Black | 10 = Platinum Blonde
- Choose a warm, cool, or neutral tone based on your desired shade.
🔹 Developer Choice:
- 10 Volume = Deposits color only (for non-gray coverage).
- 20 Volume = Covers gray and provides slight lift (best choice for root touch-ups!).
- 30 Volume = Maximum lift & coverage (I don’t recommend this unless you’re a pro!).
💡 Pro Tip: If you’re covering grays, use your color + 20 volume developer in a 1:1 ratio. if your grays are extremely stubborn, you can double the color ratio, 2:1.
Step 2: Mixing & Prepping Your Hair
✔️ In a plastic bowl (never metal), mix equal parts color and developer.
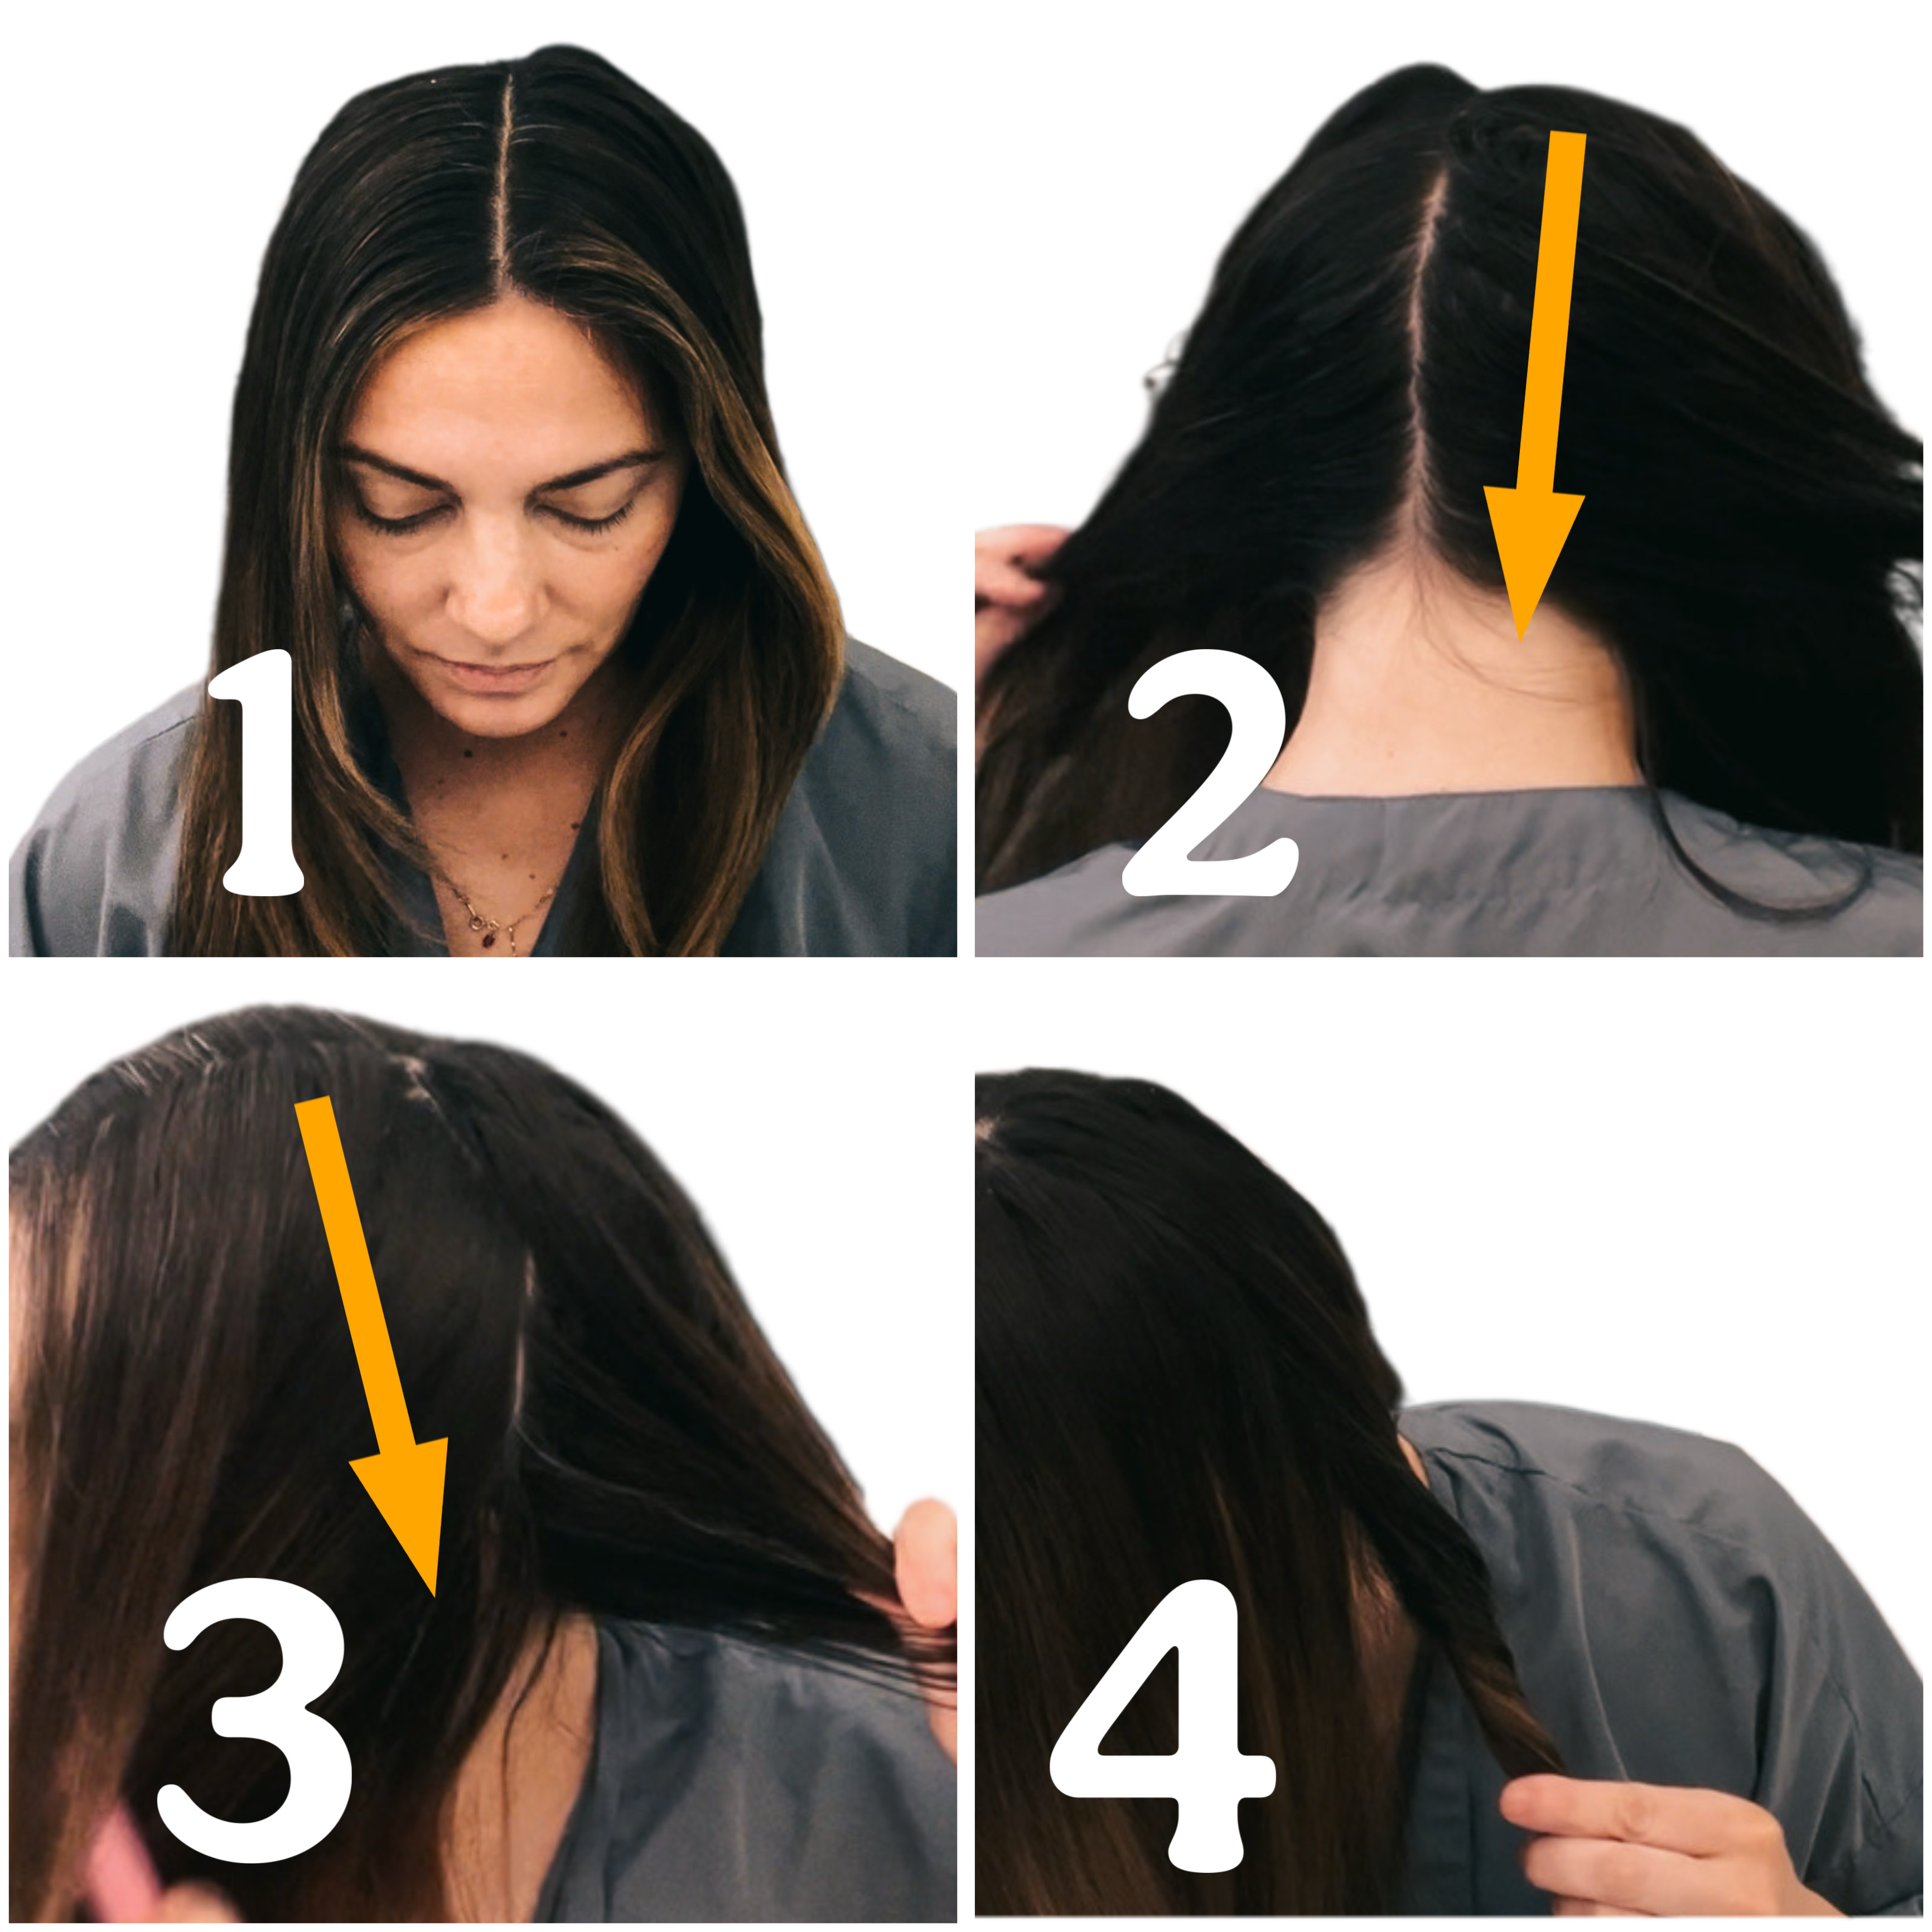
✔️ Brush & section your hair into four quadrants:
1️⃣ Part your hair down the middle from your forehead to the nape.
2️⃣ Then, section from the crown to behind the ears, creating 4 sections.
✔️ Gather your materials:
✅ Gloves
✅ Color brush
✅ Salon cape or old towel
✅ Clips to hold sections
✅ Plastic bag or shower cap (to trap heat for better processing).
✅Color remover (for skin) or windex
Step 3: Pause and read through the directions
Step 4: Applying Color to the Perimeter
Now that your hair is sectioned into four quadrants, it’s time to start coloring!i
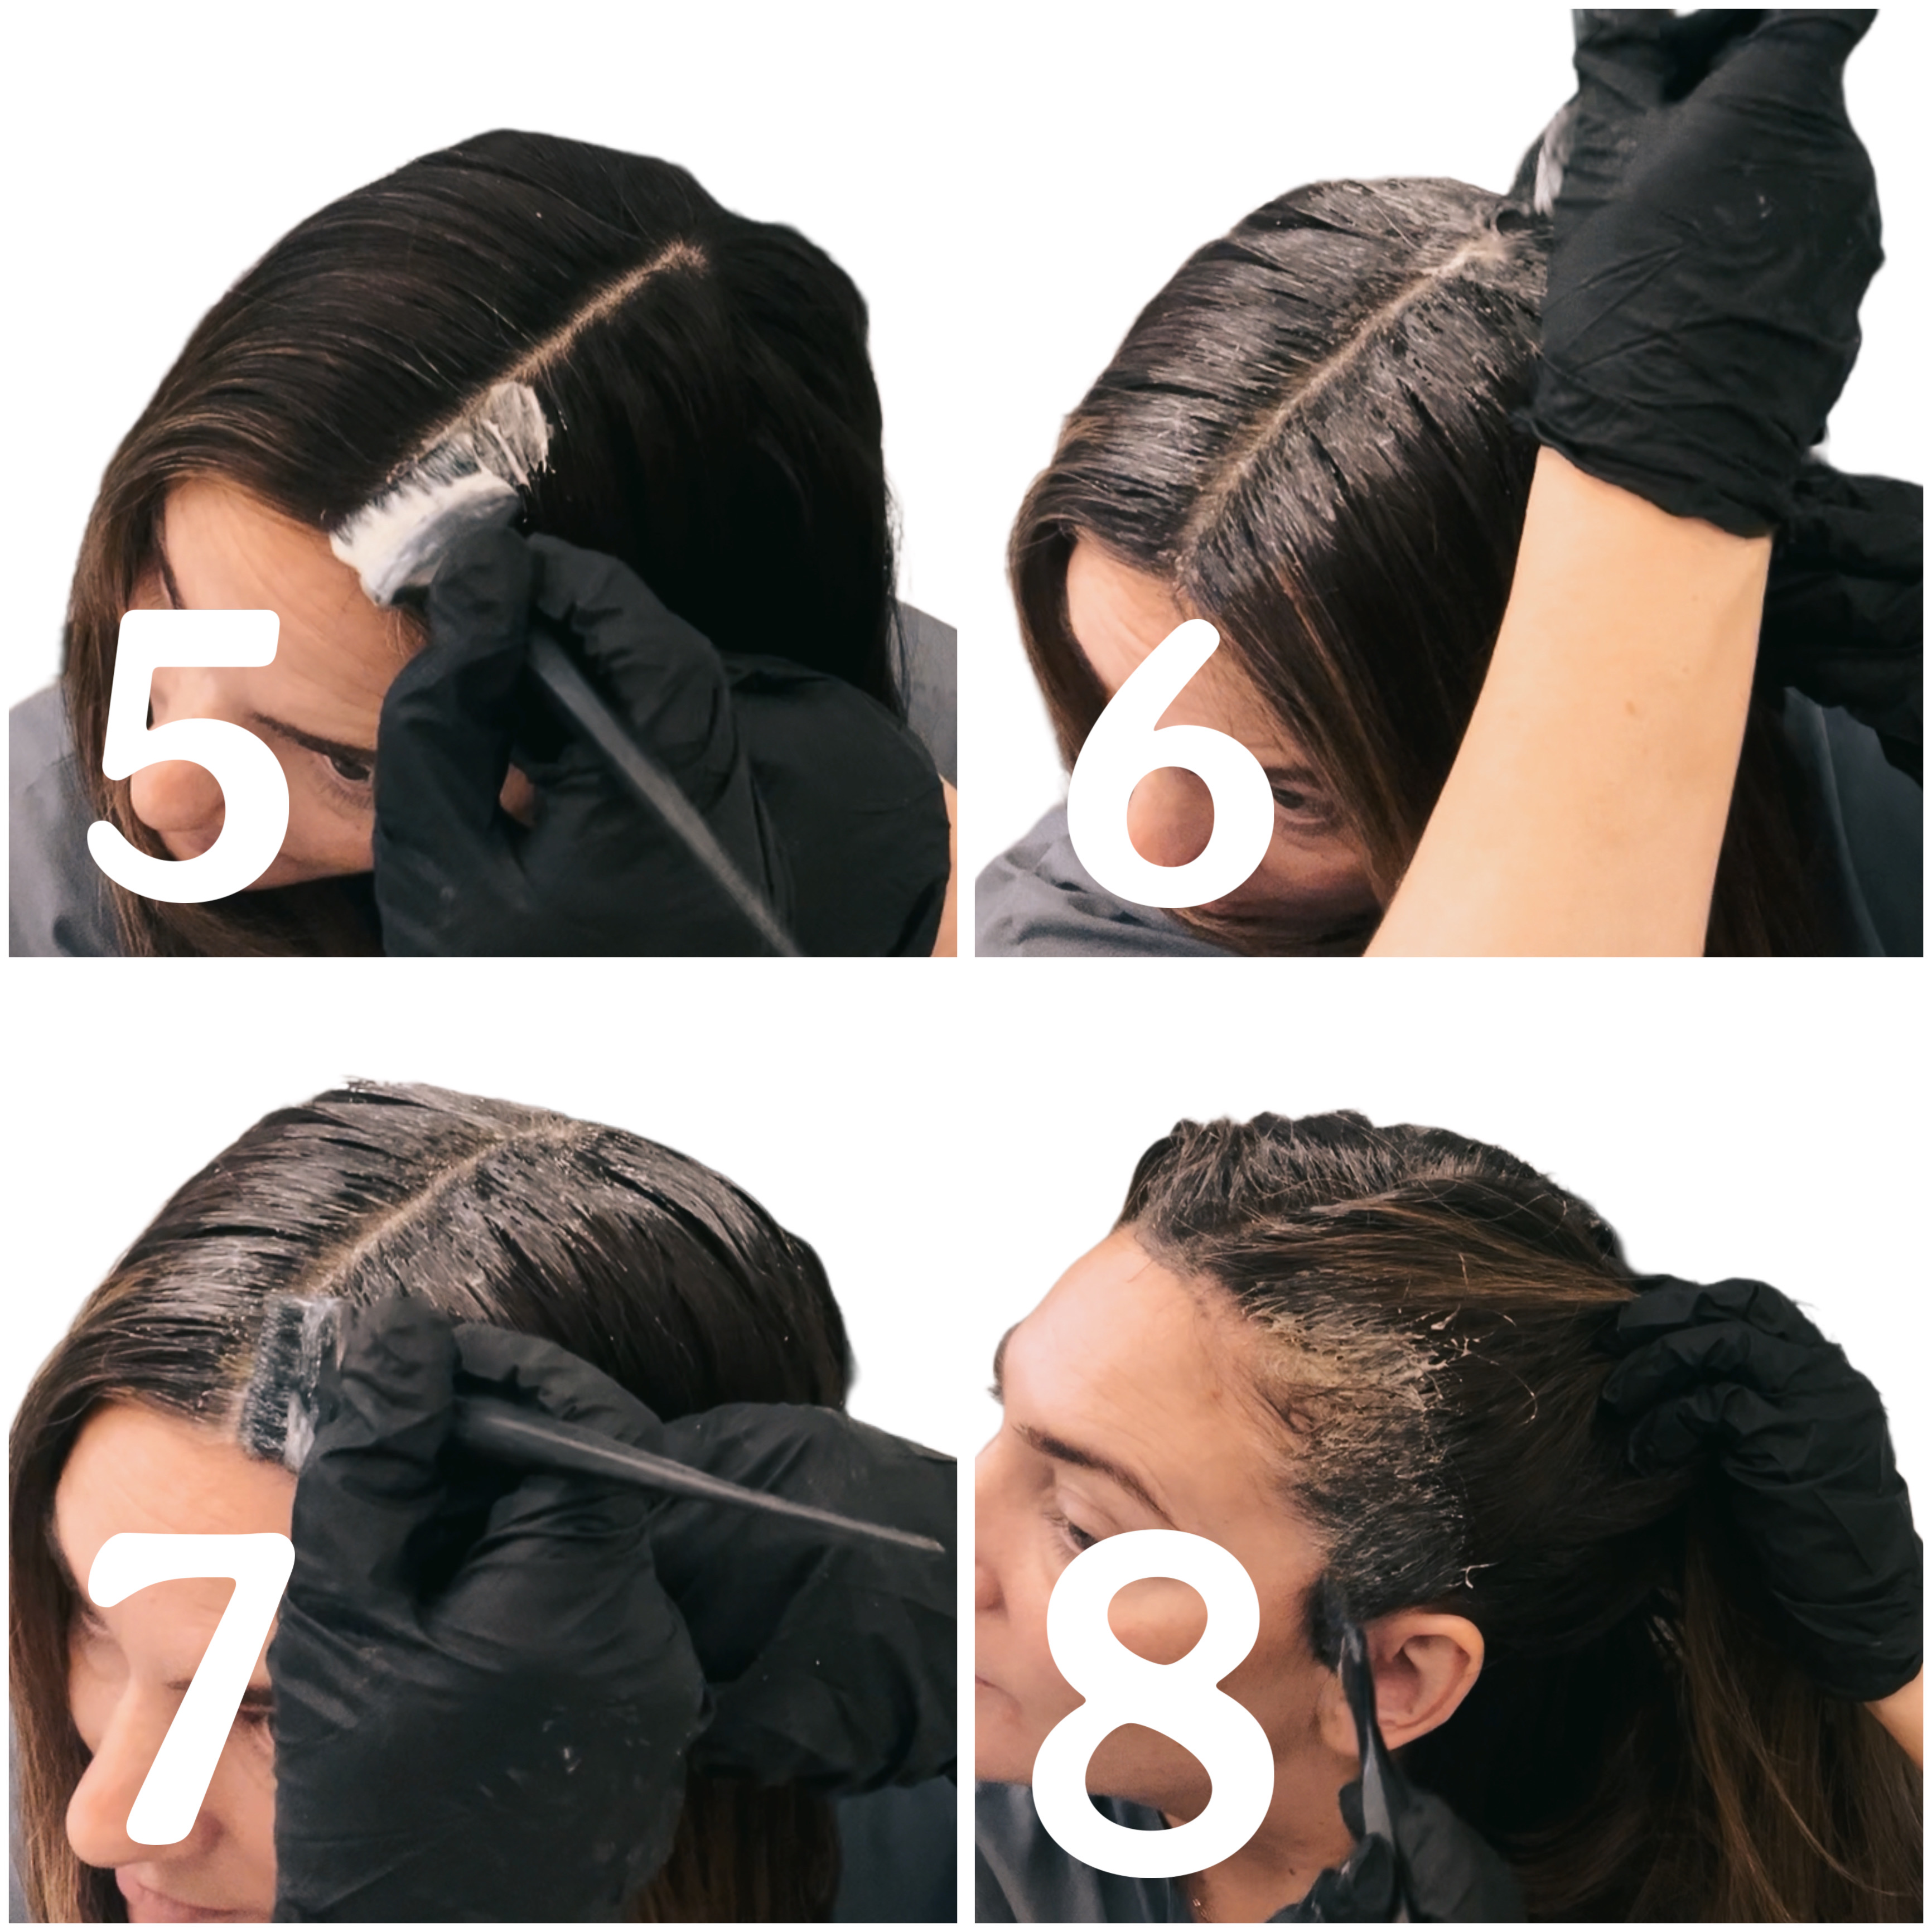
🔹 Outline Each Section
Using your color brush, apply the dye along the perimeter of each section, making sure to press the color in for proper penetration. Focus especially on:
✔️ The hairline and baby hairs—these fine strands can be stubborn, so take your time!
✔️ Don’t worry about getting color on your skin—it will wash off later.
Step 5: Coloring the Roots in Sections
Now that the perimeter is done, it’s time to color the roots within each section:
🔹 Work in ½-inch horizontal sections
✔️ Start at the top of one quadrant and take a ½-inch section of hair.
✔️ Apply firm pressure as you brush color onto the roots, making sure every gray is fully saturated.
✔️ Continue moving down through the section, working in small, even parts.
✔️ Once a quadrant is fully colored, move on to the next.
💡 Pro Tip: If you’re working alone, focus on the top and front since that’s where grays are most visible. If you have a helper, they can tackle the back for you!
Step 6: Let It Process & Rinse
✔️ Once all sections are covered, let the color process for the recommended time (usually 30-45 minutes).
✔️ If desired, place a plastic cap over your hair to trap heat for better gray coverage (especially if you have stubborn grays)
✔️ Rinse with lukewarm water until the water runs clear.
✔️ Shampoo and condition with a sulfate-free, color-safe formula.
✔️ Clean color off skin with color remover (for skin) or windex. They both work the same depending on which brand of color remover you purchase. I’ll be honest, the only one i’ve ever thought worked better than windex is a brand that can only be purchased by professionals. so it’s your choice.
The Final Look? Salon-Worthy! 💁♀️
DIY root touch-ups are easier than you think—and can save you hundreds every year! Try it out, and let me know in the comments how it worked for you.
Would you attempt this at home, or do you still prefer the salon?